DIY Dip Dye Tiered Wall Hanging
I am so excited to show you how I did my own DIY Dip Dye Tiered Wall Hanging!
Dip dying is a trend I am all for! It's such an easy DIY project you can do so many things with. I've seen several different techniques on different dip dye wall hangings and was super excited to try my own.
SUPPLIES:
Rit Dye
Two 4ft long boards
Wood Stain
Cloth
Staple Gun
Wood Glue
Claps

I knew I wanted to hang this wall hanging over our couch. So, the first thing I did was measure to see how long I would want it to hang.

Once I knew I wanted my wall hanging to be about 3ft in length I decided to cut my cord into 140 8ft-long strands.
I came up with that length by doubling the length I ultimately wanted and added a couple extra feet as I knew the dye would somewhat shrink my cord.
Then to make dip dying easier I hung my cord onto six wooden rings and secured them with a gathering knot.

When it came to dying I simply followed the instructions on the bottle and heated my water to 140 degrees Fahrenheit or 60 degrees Celsius.

I then poured my water into a large bin and added in a tsp of dish soap and a cup of salt as recommended on the bottle.


Then I added about half the bottle of dye and stirred it all together.


My cord was then ready to dip!
To achieve more of an ombré look I simply just pulled my cord out little by little, soaking the bottom parts just a bit longer.
(You could also add more dye or even different colors to create a more dramatic look).


Once I achieved the look I was going for I rinsed out my cord and hung it to dry.

While my cord was drying I then sanded and stained my two 4ft-long boards.


The next day (once everything was dry) I began stapling each of my cords to one of my wooden boards.


As you can see the dye on each of my cords starts at a different height. This I did intentionally in order to create a more zigzag effect rather than a straight line.
(If you want to create more of a straight defined line you would want to add your cord to your board before you dip dye).

Once all my cords were attached I then stained two small pieces of scrap wood to attach my two board together.


I then attached some hardware for hanging to the back of the board all my cord was attached to.

Then I glued my small pieces of scrap wood to the first board, glued the second board on top and clapped it all together.


Once everything was all secure I then hung my wall hanging up and straightened out all my cords.


Next I measured and cut my cord to the length I wanted on either side. I then used some tape to create and straight line to cut straight across.


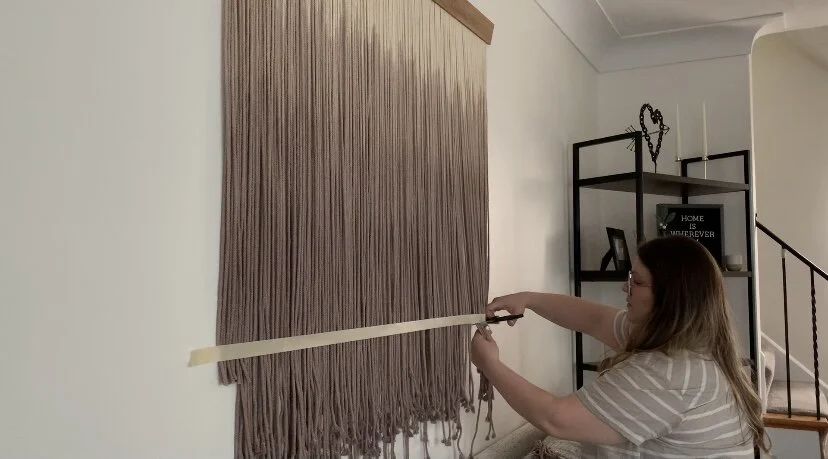
As I was cutting my cord straight across I decided to create a more tiered look.
To do this I cut each group about 6 extra inches above the center group.

And here’s how it turned out!

I hope this inspired you to create a dip dye hanging of your own!
Leave a comment below if you like this project.

Disclaimer: As an Amazon Associate I earn from qualifying purchases.