Basement Makeover | DIY Home Theater
I’ve done several room makeovers and updates throughout our home this last year but this one is by far my favorite!
The basement was the one room in our home that really needed some love. While my husband was fine with it as is, I knew I wanted to make it more functional and enjoyable to be in.
I definitely kept in mind all his wants and needs when working on this space but I hope you too will find some inspiration from all the changes made.
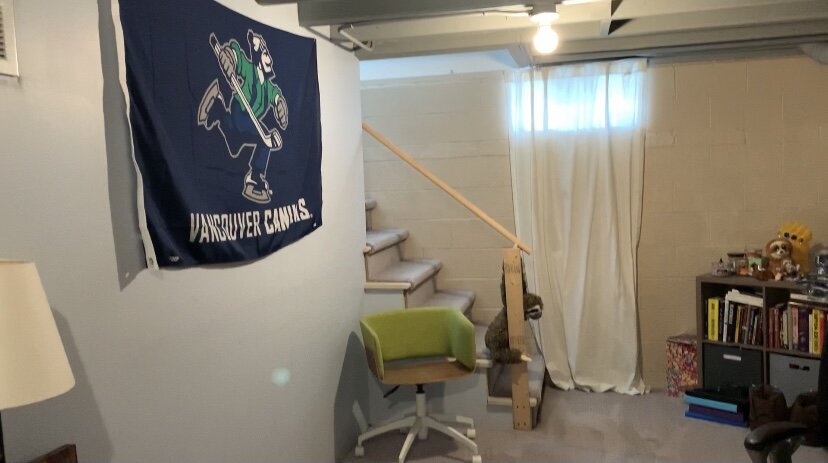
Here’s a look at the basement before…


The first thing I knew I wanted to do down here was to paint our projection wall white.
To save some money I went ahead and used the half gallon of paint I had leftover from our bedroom makeover (celestial glow by Behr).

I then moved on to updating our handrailing.
The former owners put it in just for the purpose of our FHA, but rather than replacing it all together I decided to give it some fresh stain and a coat of paint.


Then for the rest of the walls down here I decided to use the same dark gray I did in our bedroom makeover (graphic charcoal by Behr).

Painting the brick down here was definitely the difficult. Without a paint sprayer I had to painstakingly hand paint each brick to make sure the walls were fully covered.
So, when it came time to do the flat walls in the middle of the room it was a breeze.

Once all the painting was done I then moved on to adding some much needed new furniture down here.
I looked at a variety of different modular sectionals online but most were well over my budget. Then I found this six piece beauty on Wayfair for under a thousand dollars!

My husband Cody also swamped out his old peeling computer chair for a nice new gamer one and my old desk for a larger L-shaped one.
But I also wanted to give him some more seating space by adding a futon across from his Xbox.
Rather than buying a boring cheaper one I went ahead and splurged a bit on this blue velvet one. I just loved the color and that it has pockets on either side for his comic books.


When it came to decorating this space I really tried to use most of what we already had down here, so things like Cody’s Vancouver Canucks memorabilia and other nerdy figurines and collectibles he had.


I also added a storage shelf in the one corner of the room to keep all the random things we had building up on the floor down here.


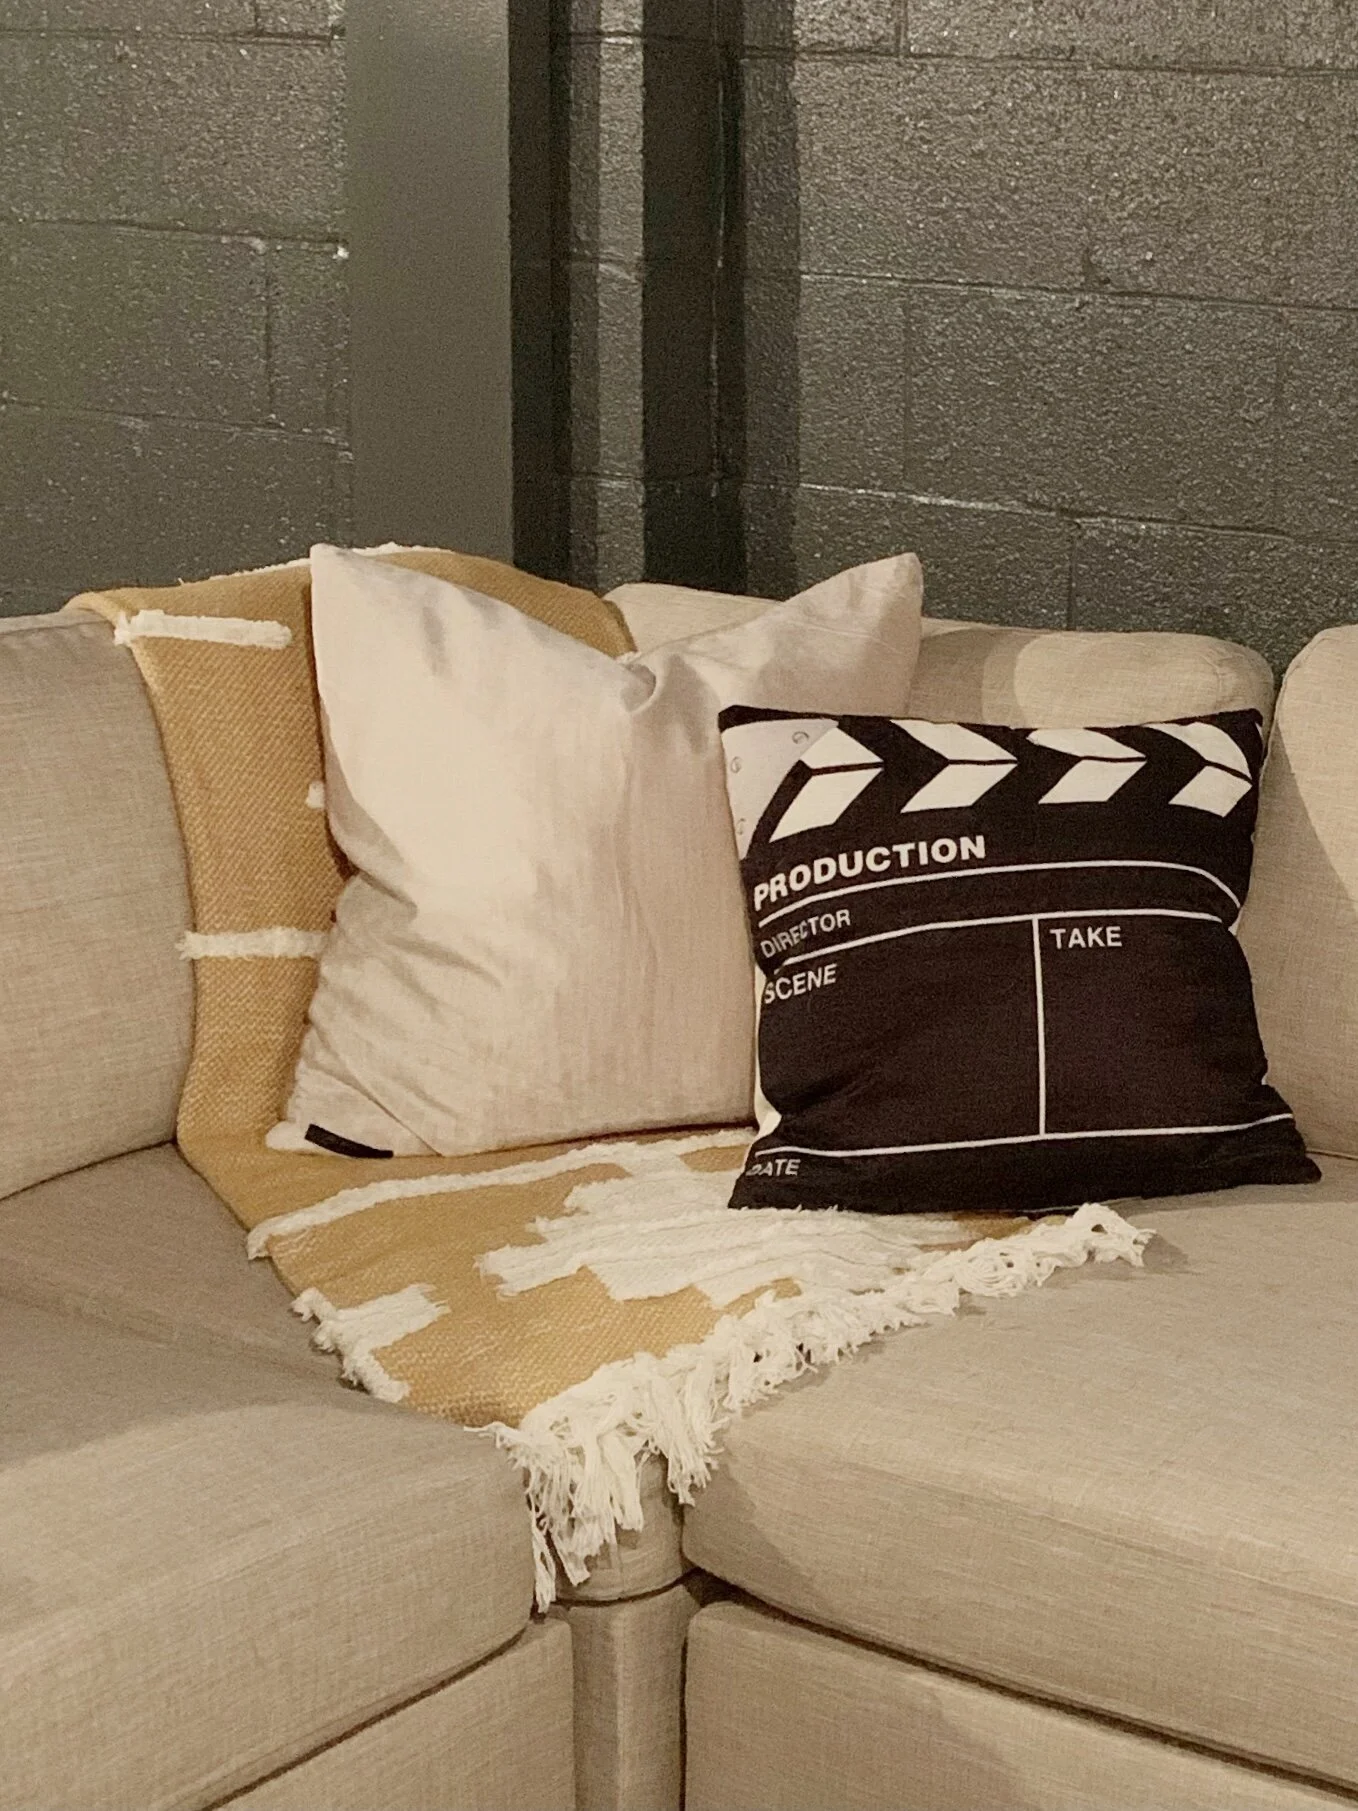
And then the one area I did buy some new items for was our little home theater set up.
I bought some new pillows from TJ Maxx and Amazon as well as a few posters to hang up of our favorite TV shows and movies.


And here’s a look at the final results!


I hope this transformation inspires you to take on a space of your own!
Let me know in the comments below what was your favorite part or what you would do differently to your own space.
SHOP THE ROOM:


Disclaimer: As an Amazon Associate I earn from qualifying purchases.